
1. When the router password lives in a chat
A switch password is in a spreadsheet, the firewall login is in a chat and a service account password is saved in one colleague’s browser. During maintenance, finding the current value becomes a separate job. Sending the spreadsheet again creates another uncontrolled copy; when that colleague leaves, nobody can reliably list what must be changed.
Passbolt is an open-source password manager built for teams. Each person has an individual identity and cryptographic keys, while approved users and groups can share a credential. An individual browser vault helps its owner remember passwords; a team vault also needs ownership, permissions and continuity when people change roles.
For example, share a switch management login with Network Operations, a hypervisor login with Virtualization and a monitoring service credential only with its maintainers. Use named accounts on the actual systems wherever possible. A shared vault does not turn a shared root login into an individually accountable account, and it does not automatically rotate passwords on those systems.
2. Central control, encryption and its limits
The browser extension performs encryption and decryption of secrets using OpenPGP, a public/private key standard. The server stores encrypted resources and coordinates users, groups and permissions. HTTPS still matters: it protects sessions and the transport path. Server administration remains sensitive even though the database is not a plaintext password list.
Removing a user’s permissions stops future authorised access through Passbolt; it cannot erase a password already viewed, copied or exported. Offboarding therefore means removing memberships and sessions, transferring ownership, and rotating credentials that person knew on the target devices and services. Keep at least two authorised maintainers for critical shared resources so access does not depend on one laptop.

3. What Community includes, and what needs Pro
Edition check: 4 November 2026. Community Edition (CE) is self-hosted under AGPLv3 and has no user limit. The official comparison lists password sharing, private/shared folders, users and groups, browser extensions, API/CLI, role-based access control and password expiry in CE. Self-hosting leaves operating-system maintenance, backups and incident response with your team; community support has no paid response commitment.
Pro adds directory provisioning for AD/OpenLDAP, SSO, account recovery through escrow, activity auditing and tags. Central policies such as MFA enforcement and passphrase/password policies are also edition-dependent. Basic role control is not exclusive to Pro. Separate a user enabling MFA from an organisation enforcing its policy. Passbolt 5.17.0 release notes explicitly make passkeys as an MFA factor available in all editions; this is not yet passwordless login or storage of third-party passkeys.
CE is a reasonable starting point when manual onboarding and a documented recovery-kit process are acceptable. If directory integration, enforceable policies or assisted recovery are requirements, assess Pro before rollout. An administrator of CE cannot simply reset a forgotten passphrase and decrypt a colleague’s private vault. Account recovery in Pro also needs prior configuration and an agreed custody policy.
4. Versions and a fresh Ubuntu host
Documentation The official Ubuntu CE installation page currently targets Ubuntu Server 26.04 LTS; Canonical lists this LTS release in its supported lifecycle. The upstream latest API release inspected was 5.17.0. We use the official stable DEB repository, local MariaDB and the package-managed Nginx/Let’s Encrypt configuration, not Docker or an installation from source. Record the actual apt candidate because the DEB revision can differ from the API tag and later security fixes can supersede it.
Use a fresh dedicated VM with a sudo account, at least 2 CPU cores and 2 GB RAM per the installation guide, plus disk capacity for the database, logs and retained backups. Installation on a host already serving other sites can overwrite configuration. The commands below are Bash for Ubuntu. They were checked against documentation, not executed on a Passbolt server for this article.
Prepare a real hostname such as vault.example.com, a reachable SMTP relay and a synchronised clock. All example domains, addresses and REPLACE_ values are placeholders. Replace them before execution. Use a subdomain at its root; this packaged HTTPS procedure does not support deployment below /passbolt.
cat /etc/os-release
dpkg --print-architecture
free -h
df -h /
sudo apt update
sudo apt upgrade
sudo apt install -y curl ca-certificates dnsutils openssl ufw
timedatectl status
Expect VERSION_ID="26.04" and a synchronised clock. If the system requests a reboot, reboot and reconnect before continuing. Confirm a working NTP/chrony service if time is not synchronised; do not run two competing time daemons.
5. DNS and the network path
Create an A record pointing vault.example.com to the correct public address/NAT destination. Publish AAAA only if IPv6 reaches this same host and service. DNS translates the hostname to an address; TLS verifies that this is the intended service. The automatic HTTP-01 certificate method needs public inbound TCP 80 during issuance and renewal. Permit HTTPS only from the corporate management network or VPN if that is your access model; the certificate challenge must still reach port 80.
dig +short A vault.example.com
dig +short AAAA vault.example.com
# Replace this example management/VPN subnet and SSH port first.
sudo ufw allow from 192.0.2.0/24 to any port 22 proto tcp
sudo ufw allow 80/tcp
sudo ufw allow from 192.0.2.0/24 to any port 443 proto tcp
sudo ufw status verbose
sudo ufw enable
sudo ufw status numbered
192.0.2.0/24 is a documentation-only subnet: replace it with the actual administrator/VPN source as seen by this host, and use your real SSH port. Keep a second SSH session or console available before enabling UFW. Mirror the intended rules at the upstream firewall. Allow required outbound DNS, time synchronisation, HTTPS package downloads and your SMTP port, typically 587. Do not publish MariaDB 3306 or PHP-FPM. If the service must be entirely private, this automatic HTTP-01 route is unsuitable; choose the official manual-certificate procedure instead.
6. Verify the repository installer and install CE
Download both official files into a private working directory. The subshell below stops if download or checksum verification fails, so the privileged installer cannot run after a failed check. A checksum obtained from the official release endpoint checks the downloaded bytes; it is not a substitute for trusting those upstream channels. Inspect the script before granting it root access.
(
set -euo pipefail
umask 077
mkdir -p ~/passbolt-install
cd ~/passbolt-install
curl --fail --show-error --location   https://download.passbolt.com/ce/installer/passbolt-repo-setup.ce.sh   -o passbolt-repo-setup.ce.sh
curl --fail --show-error --location   https://github.com/passbolt/passbolt-dep-scripts/releases/latest/download/passbolt-ce-SHA512SUM.txt   -o passbolt-ce-SHA512SUM.txt
sha512sum -c passbolt-ce-SHA512SUM.txt
less passbolt-repo-setup.ce.sh
sudo bash ./passbolt-repo-setup.ce.sh
sudo apt update
apt-cache policy passbolt-ce-server
sudo apt install passbolt-ce-server
)
Checksum output must include passbolt-repo-setup.ce.sh: OK. Inspect the candidate origin and version before answering apt’s prompt. The interactive package setup creates local MariaDB resources: select database configuration, use its local administrative account (commonly root with an empty password on a fresh setup), create application user passbolt with a newly generated unique password and database passbolt. Do not change global MariaDB root authentication just to match a screenshot. Keep the application password securely for the web wizard.
This application database account is different from the first Passbolt administrator and from the Linux sudo user. No real password belongs in a shell command, this article or a Git repository. If dependency installation fails, inspect apt’s error and OS compatibility rather than forcing a different PHP repository.
7. Package-managed Nginx and valid HTTPS
In the package dialog choose to configure Nginx, then the automatic Let’s Encrypt method. Enter your real hostname and a monitored administrator email. The DNS and port-80 requirements above must already be met. To repeat only this configuration after a failure, run dpkg-reconfigure, answer No to database setup for an existing database, then configure Nginx. Do not create a second hand-written virtual host alongside the packaged one.
sudo dpkg-reconfigure passbolt-ce-server
sudo nginx -t
sudo systemctl reload nginx
curl --head https://vault.example.com/
sudo certbot certificates
sudo certbot renew --dry-run
systemctl list-timers --all | grep -i certbot
nginx -t must report successful syntax and configuration tests. curl must verify TLS without -k and return the expected page or redirect, not another site or a 5xx response. A successful renewal dry run verifies the challenge now, not future firewall changes. Confirm a renewal timer or packaged cron schedule exists. After web configuration, ensure App.fullBaseUrl in /etc/passbolt/passbolt.php is https://vault.example.com with no conflicting hostname.
8. Web wizard, server key and first administrator
Open the final HTTPS URL from an allowed workstation and start configuration only after the wizard healthcheck is ready. Enter the local database host, port 3306, database passbolt and its application credentials. Generate the server GPG key pair in the wizard for a new instance; it identifies the API during authentication and is distinct from every user’s private key. Record its fingerprint and protect /etc/passbolt/gpg/serverkey.asc and serverkey_private.asc.
Configure SMTP in the next step and complete the named first administrator. Skip subscription-key entry for CE. Follow the user setup to install the official browser extension, generate a user key protected by a strong unique passphrase and download the recovery kit. Store that kit securely outside the browser profile, with the passphrase under a separate custody rule. Choose the security token used to recognise sensitive extension dialogs.
Losing the user private key is different from forgetting a website password. A server database backup and server GPG key do not replace that user key. Before onboarding others, verify that a test account can recover on a separate browser profile using its kit and passphrase, following the official recovery flow. Keep production keys out of email attachments and public support tickets.
9. Save SMTP settings and test the queue
SMTP is the mail-delivery protocol. Use the relay hostname, authorised sender address, dedicated credentials and encryption mode provided by your mail administrator. This guide chooses submission on 587 with STARTTLS: the connection is upgraded to TLS before authentication. REPLACE_SMTP_APP_PASSWORD is only a placeholder for an application password if your provider requires one; enter the actual value in the protected configuration interface, not the command line.
SMTP host: smtp.example.com
Port: 587
TLS / STARTTLS: enabled
Username: passbolt-mail@example.com
Password: REPLACE_SMTP_APP_PASSWORD
From: vault@example.com
Test recipient: admin@example.com
After the wizard, reopen Email server under organisation settings/administration to save any changes. A successful form test can use unsaved values. Save, then test the stored configuration from CLI and trigger an actual invitation. SPF/DKIM and sender permissions belong to the mail domain/relay; an SMTP acceptance response alone does not prove inbox delivery.
sudo -H -u www-data /usr/share/php/passbolt/bin/cake passbolt send_test_email --recipient=admin@example.com
sudo systemctl status cron --no-pager
sudo cat /etc/cron.d/passbolt-ce-server
sudo journalctl -u cron -n 50 --no-pager
Expect successful SMTP delivery in the diagnostic output and the message at the test inbox. Confirm the packaged per-minute mail job exists and cron is active. Do not add a duplicate queue cron entry. The shell command sends a real test message when a reader executes it; it was not sent during preparation of this article.
10. Invite people, create groups and share a resource
In Users, create two test users with named organisational email addresses and the normal user role. Send invitations and let each person finish extension setup and secure their own recovery kit. Create Network Operations, add the authorised members and assign at least two appropriate group managers. An administrator role is not necessary for everyone who manages a password.
Create a dummy resource such as lab-switch-management with a nonproduction URL and a generated dummy password. Add its username, purpose and operational owner without extra secrets in free text. Use Share to grant the group Read; grant Update only to maintainers who change it and Owner only to those who manage sharing. For a shared folder, inspect the permission-change preview when creating or moving resources; folder placement can alter effective access.
Sign in as the reader in a separate profile: it must read the dummy credential but must not edit or reshare it. Confirm an unrelated user cannot find/read it. Remove a test member and check access again. Document a review interval for group membership. Then rotate the dummy password at its target and update the vault so the team practises both halves of a credential change.
11. Back up data, keys and configuration together
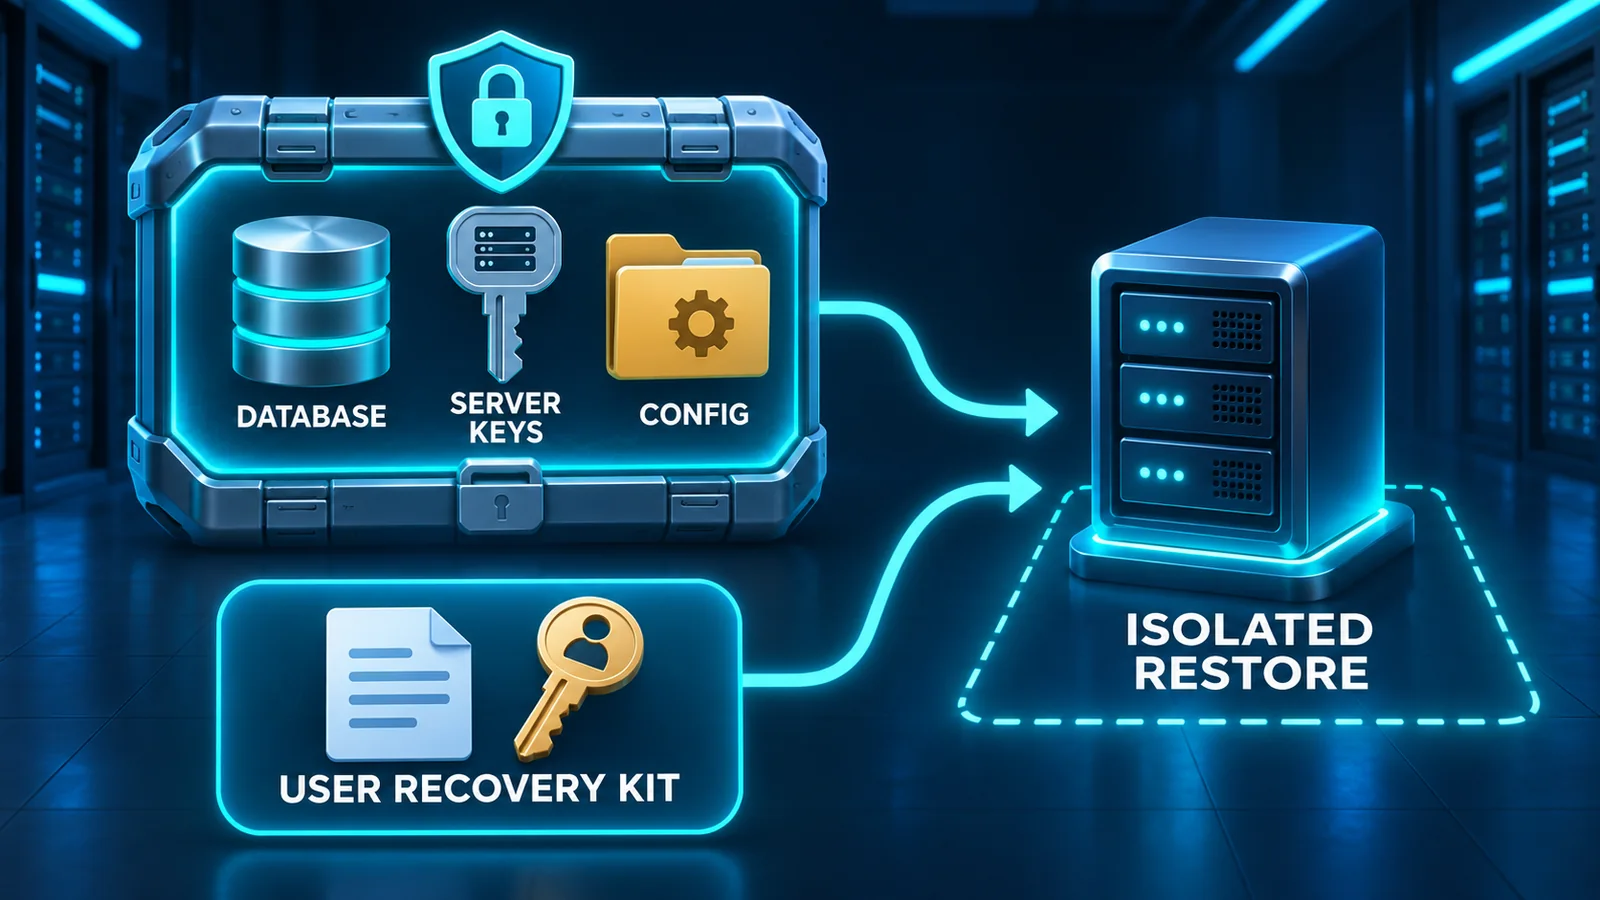
A SQL dump alone is incomplete. Preserve the database, /etc/passbolt including server GPG/JWT material, Nginx configuration, TLS material and the exact package version. User recovery kits remain a separate responsibility. The following maintenance-window example stops Nginx and cron to reduce application writes; it assumes the dedicated host from this guide, local MariaDB and no other API workers. Do not leave independent writers running.
sudo bash <<'EOF'
set -euo pipefail
umask 077
backup_dir="/var/backups/passbolt/$(date +%Y%m%d-%H%M%S)"
mkdir -p "$backup_dir"
systemctl stop nginx cron
trap 'systemctl start cron nginx' EXIT
mariadb-dump --single-transaction --routines --events --triggers passbolt > "$backup_dir/passbolt.sql"
test -s "$backup_dir/passbolt.sql"
tar -czf "$backup_dir/config-and-keys.tar.gz" -C / etc/passbolt etc/nginx etc/letsencrypt
dpkg-query -W passbolt-ce-server > "$backup_dir/package-version.txt"
cd "$backup_dir"
sha256sum passbolt.sql config-and-keys.tar.gz package-version.txt > SHA256SUMS
sha256sum -c SHA256SUMS
tar -tzf config-and-keys.tar.gz > archive-list.txt
printf 'Backup directory: %s
' "$backup_dir"
EOF
The dump uses local root socket authentication and never embeds a database password; adapt deliberately if that authentication is not available. A successful exit, nonempty SQL and verified hashes check file creation, not recoverability. This archive contains private keys and possibly SMTP/database secrets. Encrypt it with your organisation’s backup system, copy it to a separate protected location, monitor scheduled runs and enforce retention. Do not treat the unencrypted copy on this disk as the final backup.
12. Prove a recovery on an isolated host
Build an isolated recovery VM with the same package version and an empty passbolt database, without running the web wizard. Block outbound SMTP and production integrations. Transfer and decrypt the backup privately; verify SHA256SUMS first. Restore only on this disposable host. Use split DNS or a test workstation hosts entry for the original hostname, with trusted TLS, so extension origin checks are meaningful without changing production DNS.
# ONLY on the isolated recovery VM; replace the backup directory.
sudo bash <<'EOF'
set -euo pipefail
backup_dir=/var/backups/passbolt/REPLACE_BACKUP_TIMESTAMP
cd "$backup_dir"
sha256sum -c SHA256SUMS
systemctl stop nginx cron
# Confirm that the target passbolt database is empty before importing.
mariadb -N -e "SELECT COUNT(*) FROM information_schema.tables WHERE table_schema='passbolt';"
test "$(mariadb -N -e "SELECT COUNT(*) FROM information_schema.tables WHERE table_schema='passbolt';")" = 0
tar -xzf config-and-keys.tar.gz -C /
mariadb passbolt < passbolt.sql
runuser -u www-data -- /usr/share/php/passbolt/bin/cake passbolt keyring_init
runuser -u www-data -- /usr/share/php/passbolt/bin/cake cache clear_all
runuser -u www-data -- /usr/share/php/passbolt/bin/cake passbolt healthcheck
nginx -t
systemctl start nginx
EOF
The empty-table check must return 0; if it does not, stop rather than deleting a database. Restore the application database password/account and permissions to match passbolt.php before import. Local mariadb imports this guide’s raw mariadb-dump file; do not confuse it with the optional Passbolt sql_export/mysql_import workflow. keyring_init imports the restored server key into the web user’s keyring. Preserve archive ownership and restrictive permissions; do not generate a new server key to hide a mismatch.
Keep cron stopped in the recovery environment. Check healthcheck, sign in with a test recovery kit and passphrase, decrypt the dummy shared resource and repeat the authorised/unauthorised access checks. Measure the recovery time, record missing steps and securely retire the drill VM. Only this drill can support a claim of tested recovery; these instructions themselves are not evidence that it has been performed.
13. Updates and restricted administration
Before an upgrade read the target release notes, take the backup above and verify a recovery point. In a maintenance window stop web access, update Passbolt before the wider OS upgrade as the official guide advises, then clear cache. If any step fails, inspect it before continuing. A package downgrade alone does not roll back a migrated database; restore the matching version, database and keys on an isolated host first.
sudo systemctl stop nginx
sudo apt update
sudo apt --only-upgrade install passbolt-ce-server
sudo apt upgrade
sudo -H -u www-data /usr/share/php/passbolt/bin/cake cache clear_all
sudo -H -u www-data /usr/share/php/passbolt/bin/cake passbolt healthcheck
sudo nginx -t
sudo systemctl start nginx
dpkg-query -W passbolt-ce-server
Restrict SSH and HTTPS to approved administration paths; monitor free disk, backup age, certificate expiry, mail failures and healthcheck. Keep browser extensions and endpoints updated as well as the server. Enable an available MFA factor and verify its edition-specific enforcement. Maintain a controlled emergency-access process independent of a single person, and review groups after role changes. Human-shared credentials are not a replacement for short-lived machine secrets or a workload secrets manager.
14. Email failures and the wrong Nginx certificate
If email fails, first run the saved-settings CLI test above. Authentication failures need the relay’s credentials/app-password policy and authorised sender checked. Timeouts need DNS, egress and the port/encryption combination checked. This guide uses STARTTLS on 587; do not apply that mode to an implicit TLS service on 465. Use the provider-specific settings rather than disabling certificate validation.
getent ahosts smtp.example.com
openssl s_client -starttls smtp -connect smtp.example.com:587   -servername smtp.example.com -verify_hostname smtp.example.com   -verify_return_error </dev/null
sudo -H -u www-data /usr/share/php/passbolt/bin/cake passbolt send_test_email --recipient=admin@example.com
sudo systemctl status cron --no-pager
sudo journalctl -u cron -n 100 --no-pager
If the CLI test works but invitations do not, check saved Email Notifications, the packaged cron job and quarantine/spam. If only the web form test works, save its values and retest CLI: database-stored SMTP settings take precedence over file/environment settings. After an update, unknown EmailQueue columns can indicate stale cache or an incomplete migration; review upgrade output and migrations status before changing the schema. Never publish debug output containing recipients, tokens or credentials.
Official email-delivery troubleshooting
A wrong certificate can appear even when nginx -t succeeds. Nginx chooses a TLS virtual host during the handshake using SNI, the hostname sent by the client before HTTP. A request to the bare IP, a wrong AAAA record, a duplicate server_name, an unmatched listen socket or an upstream proxy serving its own certificate can select a different site. Check the actual address and SNI together, not just the certificate file on disk.
dig +short A vault.example.com
dig +short AAAA vault.example.com
openssl s_client -connect vault.example.com:443 -servername vault.example.com   -verify_hostname vault.example.com -verify_return_error </dev/null
openssl s_client -connect vault.example.com:443 -servername vault.example.com </dev/null 2>/dev/null   | openssl x509 -noout -subject -issuer -dates -ext subjectAltName
# Replace the documentation address with the actual origin IP:
curl --resolve vault.example.com:443:192.0.2.10 --head https://vault.example.com/
sudo nginx -T 2>&1 | less
sudo journalctl -u nginx -n 100 --no-pager
The TLS verification must succeed and SAN must contain the requested hostname. In the active Nginx configuration find the server block matching that name and its IPv4/IPv6 443 listeners; match ssl_certificate to the correct full chain and ssl_certificate_key to its private key. Remove only confirmed duplicate/stale virtual-host entries after a backup; do not delete the default site blindly. Fix DNS/proxy routing when the wrong machine answers, then nginx -t and reload. Do not use curl -k or bypass the browser warning as the fix.
15. Final acceptance checks
dpkg-query -W passbolt-ce-server
sudo systemctl is-active nginx mariadb cron
sudo -H -u www-data /usr/share/php/passbolt/bin/cake passbolt healthcheck
sudo -H -u www-data /usr/share/php/passbolt/bin/cake migrations status
curl --head https://vault.example.com/
sudo certbot renew --dry-run
Accept the installation only when services are active, healthcheck has no unresolved failures, migrations are up, TLS validates and renewal works. Also complete an inbox invitation, login, dummy resource decryption, read-only sharing, denied access from an unrelated account, membership removal and an isolated recovery drill. Investigate healthcheck warnings individually. A green home page or an HTTP 200 alone is not sufficient.
From scattered copies to a maintained team vault
Start with one team and dummy credentials, prove permissions and recovery, then move a small set of real shared accounts through an approved process. Rotate them during migration and remove obsolete spreadsheet/chat copies according to retention policy. The useful outcome is that an authorised colleague can find the current credential and an owner knows who should keep access, with an explicit recovery route when a device is lost.
Frequently asked questions
Can CE be used by a large team?
CE has no user limit, but capacity, operations and required policy/recovery features still need assessment.
Does removing access change the device password?
No. Rotate the credential on the target system and update the remaining authorised shares.
Is a database backup enough?
No. Server keys, configuration and TLS material are also needed; user recovery kits remain separate.
Official references and related reading
Passbolt CE installation on Ubuntu
SMTP configuration and saved settings